Originally published on December 29, 2021, updated October 24, 2024
Menu
Join Our Email List
- Receive our monthly newsletter.
- Stay up to date on Amazon policies.
- Get tips to grow your business.
Editor's note: On September 1, 2022, Send to Amazon officially replaced the send/replenish workflow. FBA shipments must be created using Send to Amazon or software that connects to Amazon's API, such as RestockPro. Learn how to use Send to Amazon with RestockPro here.
The following steps will help you learn how to ship to Amazon FBA effectively using the send/replenish inventory workflow.
Before sending your shipment, you’ll need to create a shipping plan. Your plan will include:
You’ll select the products you’re sending to Amazon on the Inventory Amazon Fulfills page in Seller Central (located under Inventory > Manage FBA Inventory). Then select Send/Replenish Inventory.
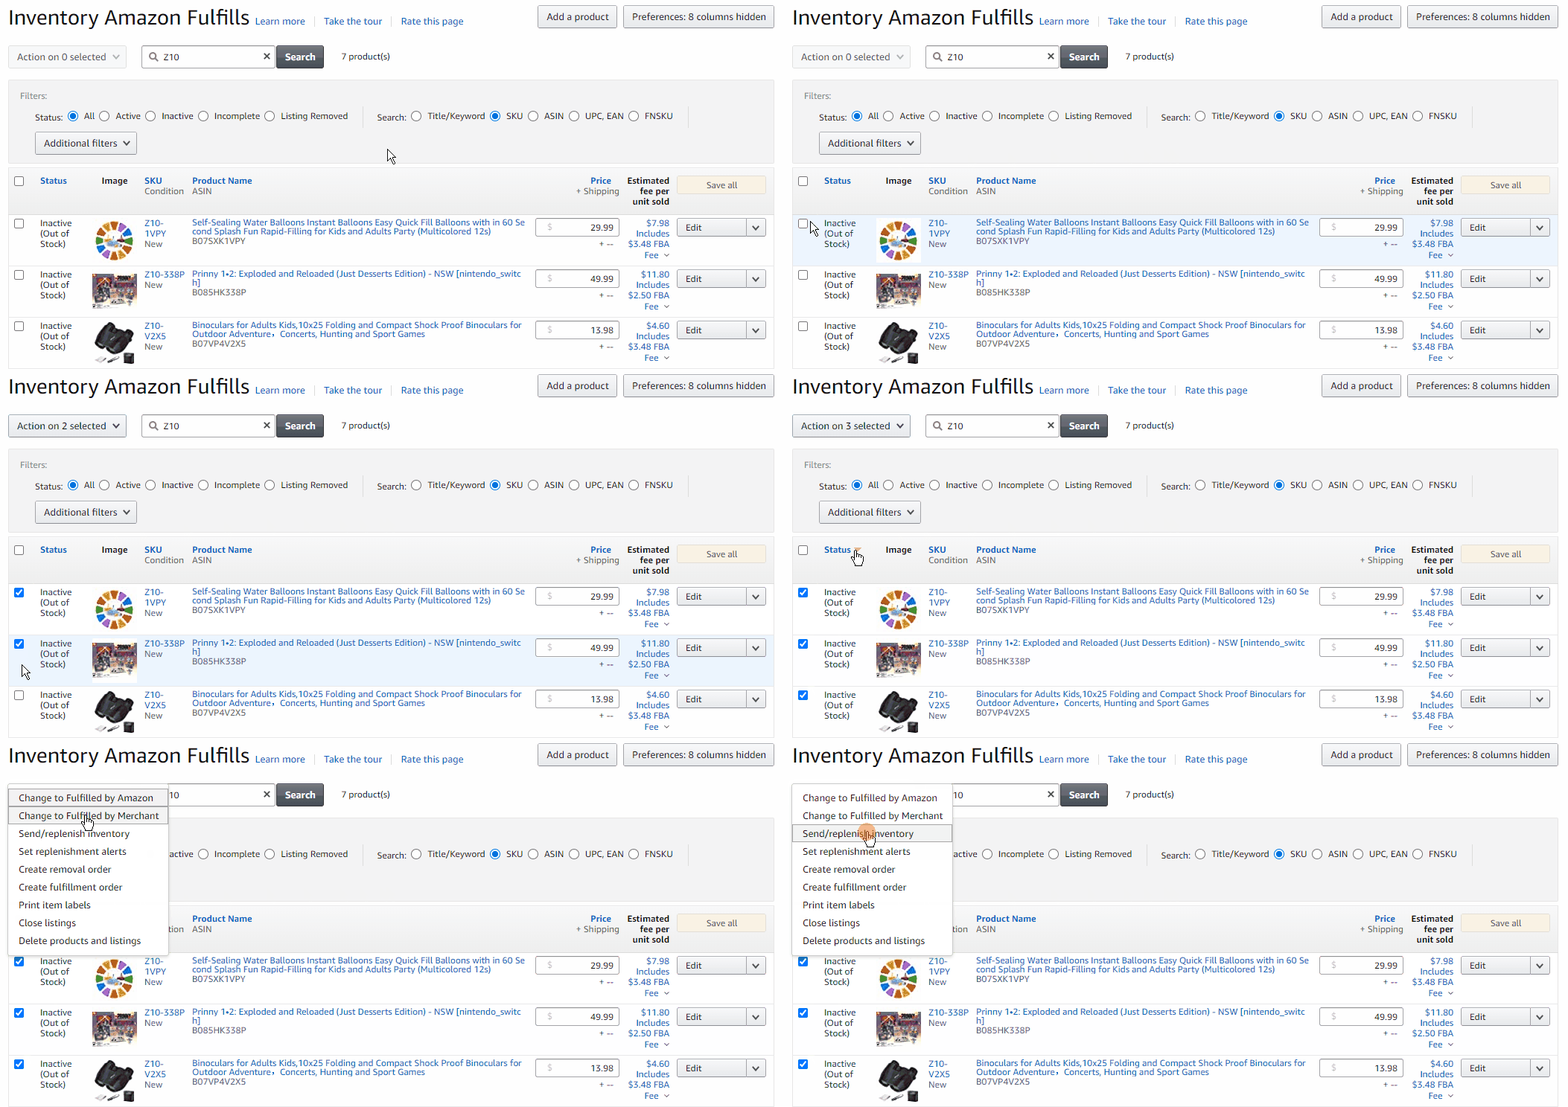
You can create a new shipping plan or add your products to an existing shipping plan. Confirm the location for your ship-from address, which is where your inventory will be picked up. Then confirm the packing type: individual or case-packed. If you have an ASIN with multiple parts, it needs to be shipped in a single package.

You can also provide your shipping plan details with a spreadsheet or with a third-party FBA inventory management tool like RestockPro.
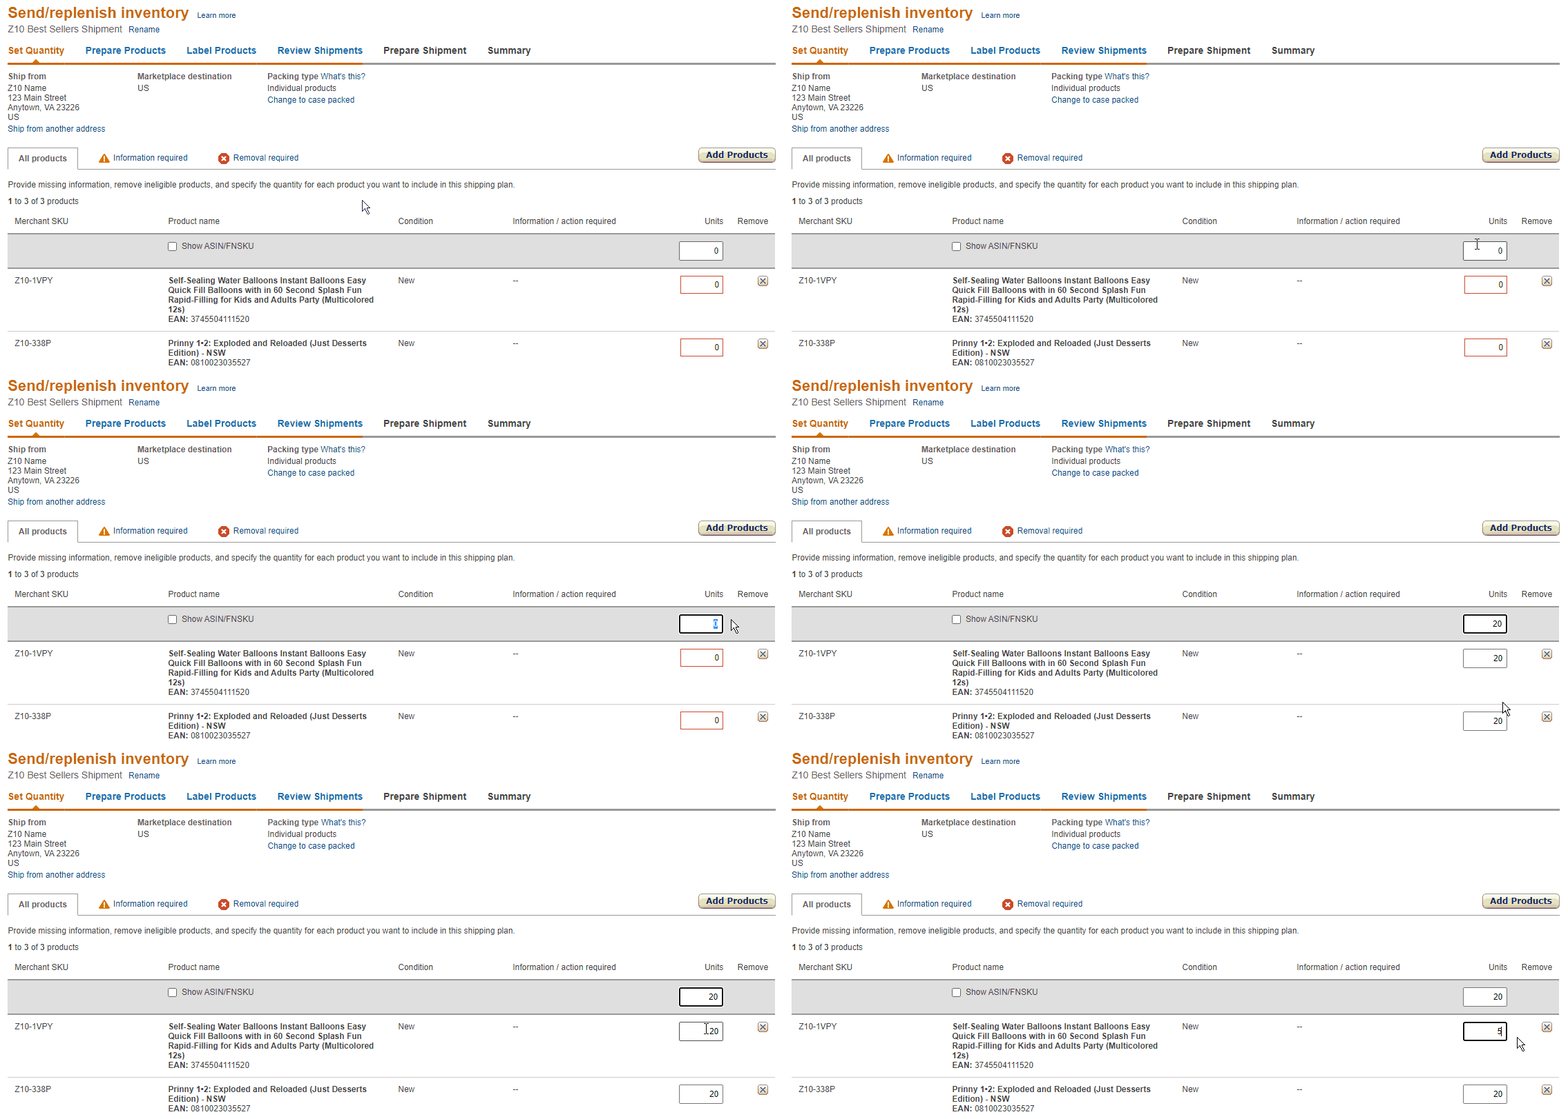
After you’ve selected your products, set the quantity for each product you plan to ship to FBA.
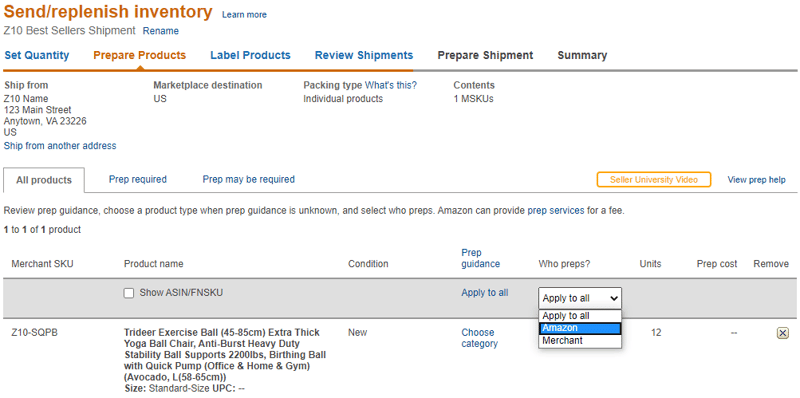
If you prefer to have Amazon prepare your products, select Amazon under Who preps. There is a per-item cost associated with the FBA Prep Service.
Whether you’re prepping your own products or using an FBA Prep Service, make sure your items are packaged to arrive safely at the fulfillment centers.
The Prep required tab on the Prepare Products page in Seller Central includes information for products that have specific requirements for shipping preparation. If your products are not prepared according to Amazon FBA requirements, you may be charged for unplanned prep services. Prep requirements might include poly bagging, bubble wrap, and/or tape.
The Prep may be required tab shows products that do not have available prep guidance. If you know the prep need for these products, choose the category and prep category that best fits the product. If the product doesn’t need additional prep, choose No prep required.
You can label products for FBA by:
You can see which of your products require labels in the Labeling required tab. Once you’ve approved your shipping plan, you will not be able to edit who labels your products, so double check here to make sure that you have selected the correct option.
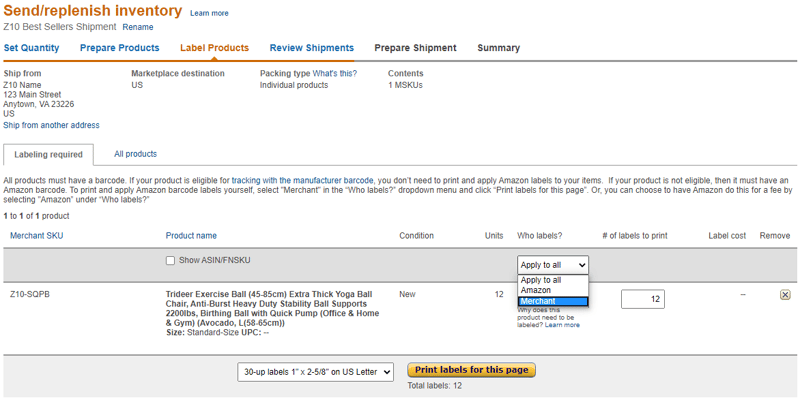
If you want to pay a per-item fee to have your labels created and affixed at the fulfillment center, select “Amazon” from the “Who Labels?” menu.
If you prefer to label your products, select “Merchant” from the dropdown. You can then print labels in a variety of formats. Select your preferred format to generate a PDF document that can be printed on label paper. Be sure to affix labels according to Amazon’s specifications for your category.
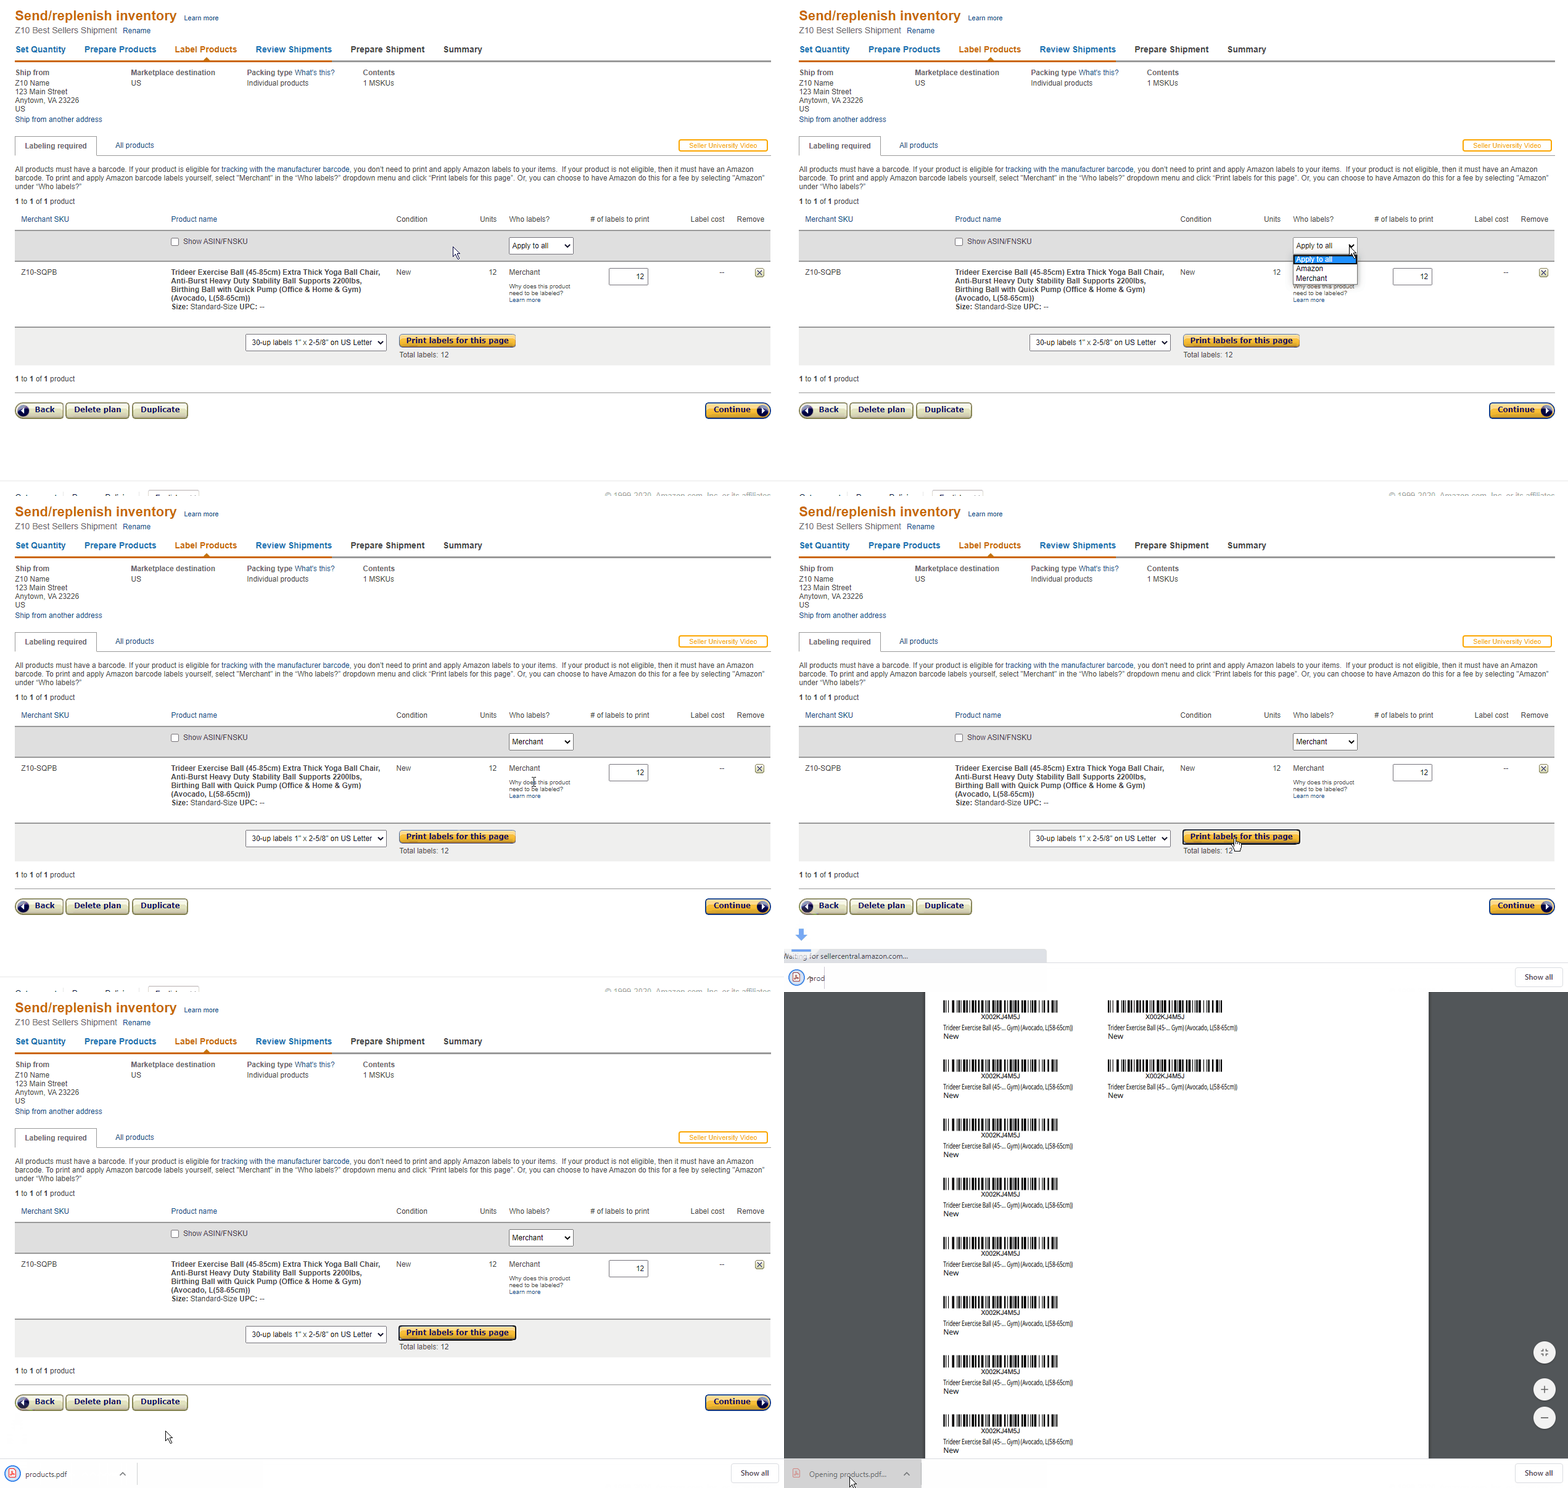
When labeling your products, make sure you place the correct barcode on each item and cover all other visible barcodes except for any serial numbers or Transparency codes. Never place a barcode on the curve or corner of a package, and double-check that each item in a case pack has an Amazon barcode. Any remaining barcodes on the case should be removed.
The inventory in your shipping plan might be split into multiple shipments to different Amazon fulfillment centers. This allows Amazon to distribute your inventory for optimized shipping speeds, managing special storage/handling requirements, and/or ensuring proper processing.
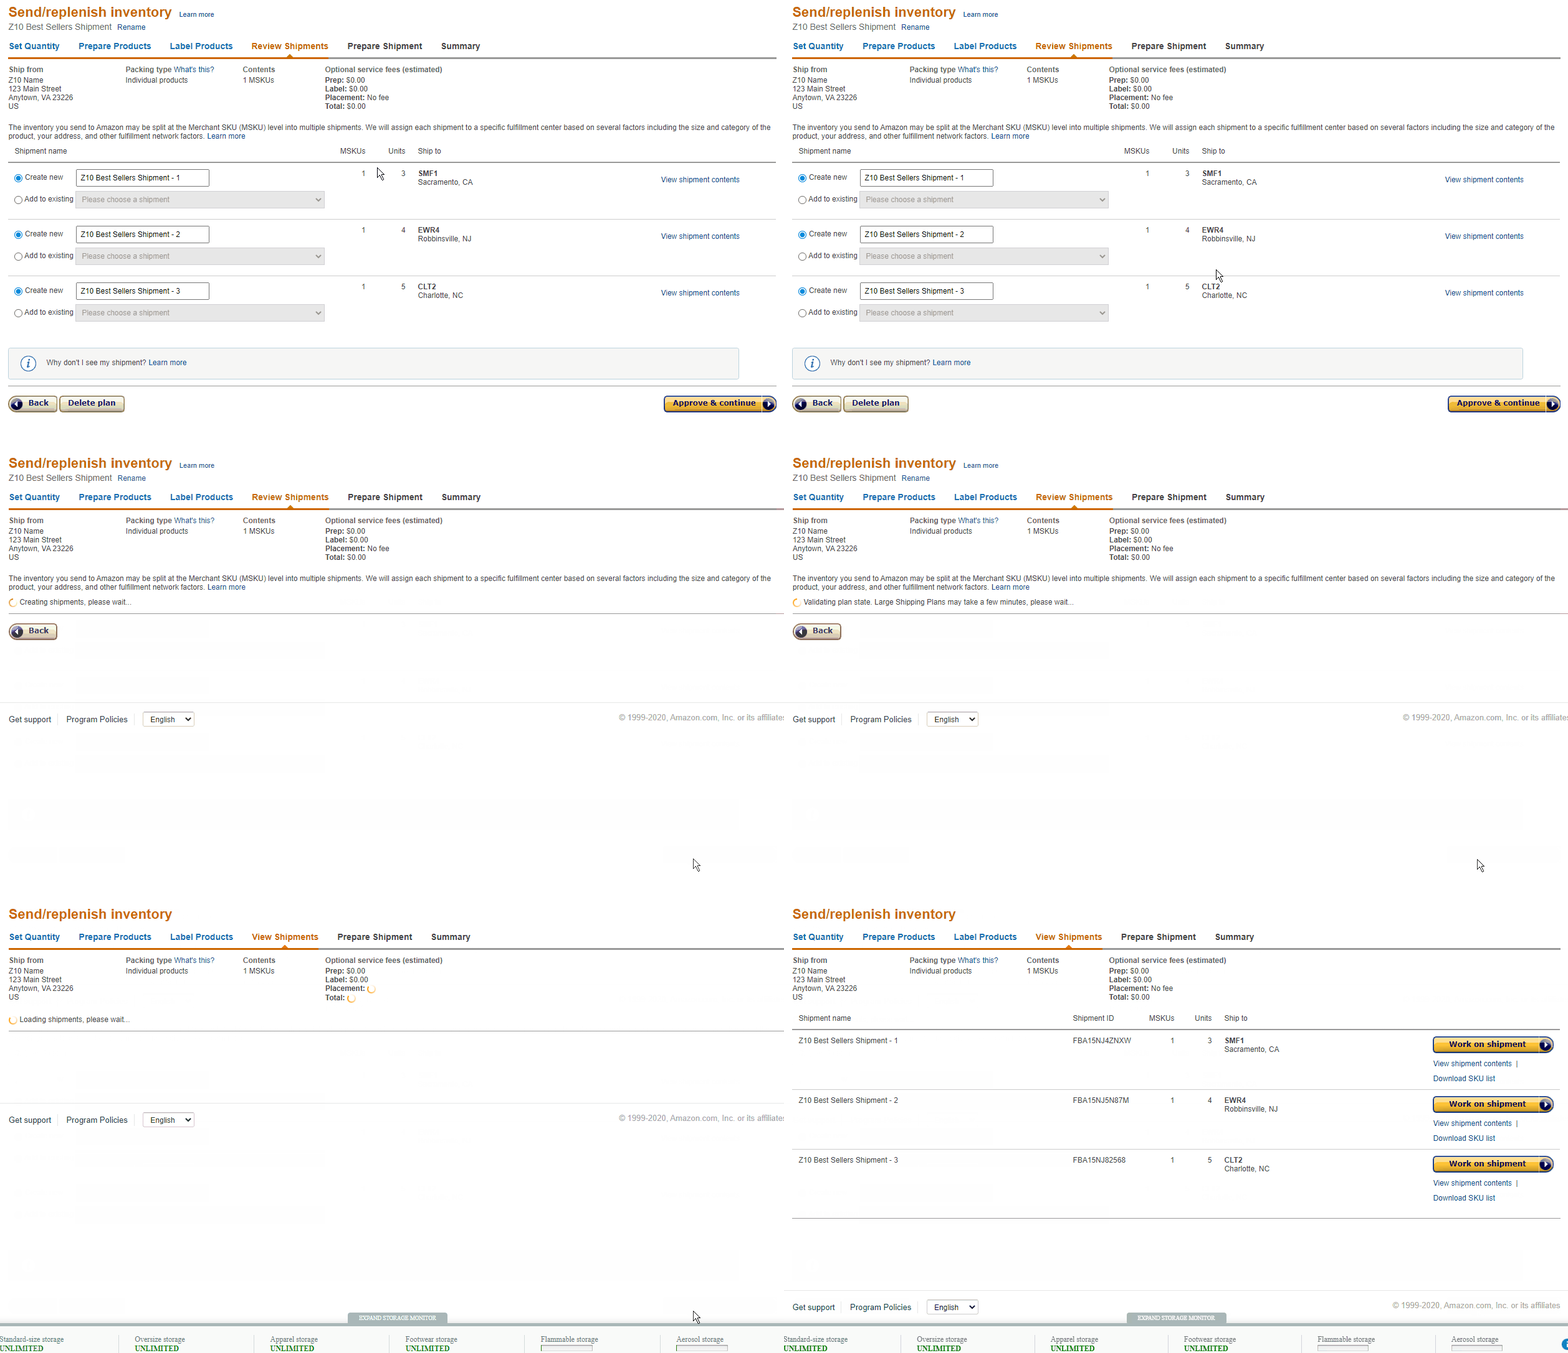
You’ll see a list of the shipments along with the shipment ID and destination fulfillment center for each of your shipments on the Review Shipments page. If you make changes to your shipping plan, the number of items in each shipment may change. Be sure to review the plan carefully before approving it. Once the plan is approved, you can only change it by deleting the entire shipping plan and creating a new plan.
After you approve the shipments, the Review Shipments page becomes the View Shipments page.
You’ll select your shipping method, carrier, and the number of boxes for your shipments on the Prepare shipment page. The cost to ship to Amazon FBA will vary depending on your shipping selections. You can also schedule and pay for your shipment from this page as well as print the labels for your shipping boxes or pallets. You can make minor changes to your shipping plan from this page, and your shipping fees will be updated automatically.
Make sure to choose the correct shipping method for your shipment. If you send shipments with a different method or multiple methods/carriers, you may experience issues when requesting a delivery appointment. It’s important to provide accurate box weight and dimensions for all of your shipments. Be sure to familiarize yourself with Amazon’s shipping and routing requirements.
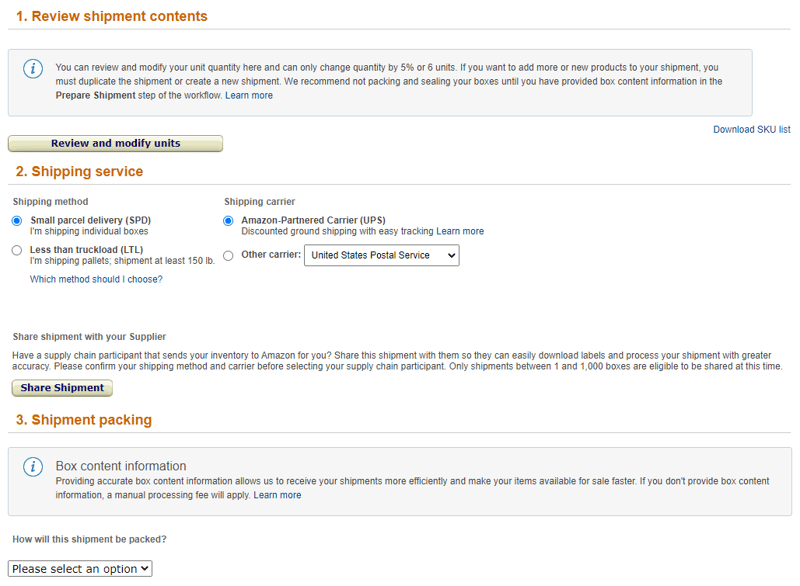
The number of boxes you send in a shipment depends on the shipping method you choose. There is a 200 box limit for Small Parcel Delivery (SPD) with an Amazon partnered carrier and a 500 box limit for a non-partnered carrier. For Less-than-truckload (LTL) shipments, there is a 5,000 box limit. Note that LTL trucks might contain shipments to other locations. If your shipment qualifies for Full Truckload (FTL), your shipment will go directly to the Amazon fulfillment center. You need an advanced delivery appointment for both LTL and FTL shipments.
Amazon sends email notifications if your shipments using FTL, LTL, and intermodal shipping modes experience any changes or delays. These messages include shipment details such as shipment ID, total pallets, total cartons, and total weight.
The Summary page shows an overview of your shipments. Here you’ll find tools for tracking carrier progress and the FBA receiving process. Reconciliation of shipped inventory typically takes 16-30 days, but it can be as long as two months. You can see the status of your shipment in the Shipping Queue.
You can change the number of boxes in your shipment from this page, but if you do so after printing your labels, you’ll need to reprint the whole set of labels for the shipment.
Once your shipment has been received at the fulfillment center, you can identify any discrepancies between what was listed and what was received with the Reconcile tab. You can submit a research request to find the missing items if need be.
To create your first shipment, visit the send/replenish inventory workflow page in Amazon Seller Central.
Now that you know how to ship to Amazon FBA, you're ready to start selling inventory. Good luck!
Originally published on December 29, 2021, updated October 24, 2024
This post is accurate as of the date of publication. Some features and information may have changed due to product updates or Amazon policy changes.
14321 Winter Breeze Drive
Suite 121 Midlothian, VA 23113
Call us: 800-757-6840





Copyright© 2007-2025 eComEngine, LLC. All Rights Reserved. eComEngine®, FeedbackFive®, RestockPro®, and SellerPulse® are trademarks or registered trademarks of eComEngine, LLC. Amazon's trademark is used under license from Amazon.com, Inc. or its affiliates.