RestockPro automatically imports your active FBA listings when you sign up, but you can also add or edit products manually. Go to the Products page in the top navigation to view, add, and edit products.
Note: If your FBA listings have not been imported into RestockPro within 24 hours after signing up, or if they look inaccurate, try refreshing your Amazon connection. If you still have issues after a few hours, contact us for help.
On the Products page, click a product to view or edit its details. If you need to update several products at once, use the CSV download/upload features (scroll down to learn more).
Types of Products in RestockPro
Active Amazon Listings
These are the FBA listings that are active in Seller Central, which RestockPro syncs with automatically.
To work with these in RestockPro, associate each listing with a supplier. Be sure to add your fees and costs associated with the product to RestockPro for accurate margin calculations. You can also add other identifying information, such as tags or notes.
New Amazon Listings
New listings may not be available in RestockPro immediately due to Amazon's configuration, but you can add them to RestockPro manually. Click "Add Product" and enter the SKU, title, ASIN, and FNSKU. The rest of the Amazon-related data will be automatically populated as soon as it is available.
Kits & Kit Part SKUs
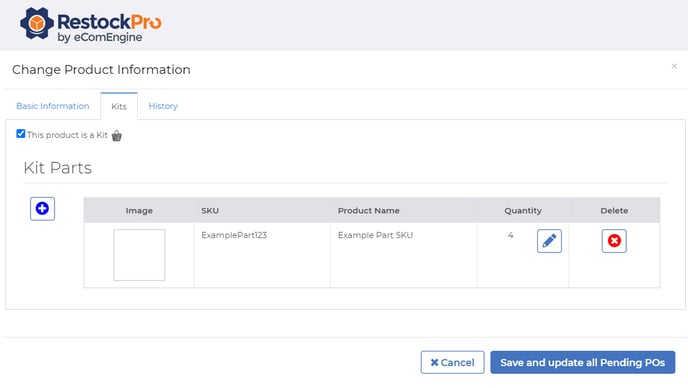
If you sell custom bundles or multipacks, you should set them up as kits in RestockPro so that RestockPro can remind you to restock the right number of each of the parts of that bundle or multipack. Learn how to set up Kits here.

Inactive Products
Products that you no longer wish to be considered for restocking should be marked inactive. You can use the drop-down on the left side of the Products page to mark a SKU as active or inactive, or use the CSV upload to update the SKU status in bulk. Learn more about when to make products inactive.
Updating Products in Bulk via CSV File
To add or update products via CSV file:
- Filter the Products grid any way you want to get a specific group of products, or clear all filters to see all products.
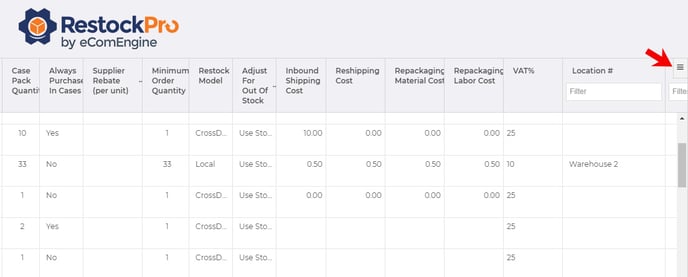
- Click the hamburger icon at the top right of the grid to ensure you are seeing all the columns you need to update.

- Click the CSV Options button on the Products page and choose "Download." This will download the current view.
- We strongly suggest downloading the file twice and saving one as a backup copy before making any updates because CSV uploads cannot be reversed.
- If your products have not been imported yet and you want to add some or all via CSV, you can choose "Get Template" instead.
- In one copy of your file, make changes or add information:
- Note: The SKU, Supplier Name (Alias), and Cost Per Unit are required fields.
- To add product tags, enter tags in the Tags column separated by a semicolon (;). To remove all tags from an item, type <DELETE> in the tags field.
- Save the edited file as a CSV.
- Click the CSV Options button again and choose "Upload."
For more tips on using CSV files, click here.
Product Information
Click on a product to open the Change Product Information popup. The Basic Information tab shows information like name, SKU, weight, cost, and more.
For details on all the fields you can update for each product, see What product information can I add to RestockPro?
Box Configuration
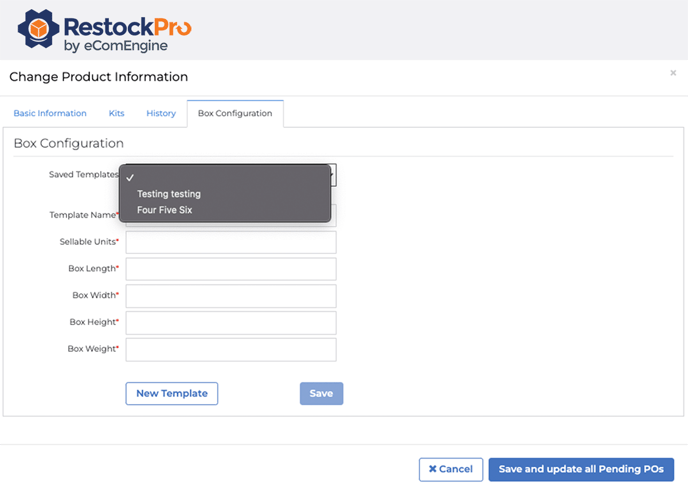
The Box Configuration tab allows you to save a description of how items are packed for shipment to Amazon. This includes box dimensions (length, width, height), weight, and the number of sellable units inside.
You can save up to three descriptions, called templates, for each product and select from those templates when creating a shipment file in RestockPro.

Learn more about creating box configuration templates individually or in bulk in this article and video.
History
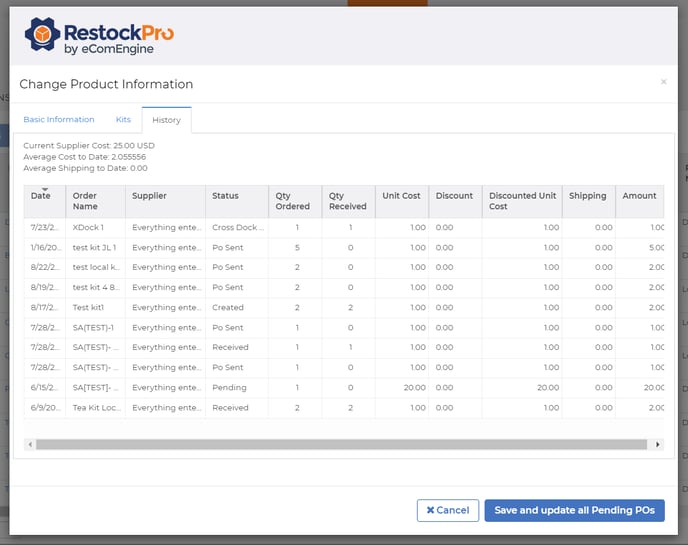
In the Product Information popup, you can also select the History tab. This shows the PO history for the SKU and the average cost paid historically for the product.

Filters
Use filters available in the header of some columns to filter products by status (active or inactive), type (kit, part, part-only), supplier, and location number.
Stickers
You can print stickers (or labels) from the Products page by selecting one or more SKUs and clicking "Print Stickers." Learn more about stickers here.

